
Key Takeaways
Painted cabinets can remain attractive for many years, but their lifespan depends on preparation, materials, daily use, and routine care.
- Professionally painted cabinets commonly last about 7 to 10 years with normal use and maintenance.
- Busy kitchens create more wear through grease, steam, spills, and repeated contact.
- Thorough cleaning, sanding, repairs, and careful application matter as much as the paint itself.
- Small chips, loose hardware, and worn edges are often repairable before a full repaint is needed.
- Repainting usually makes sense when cabinet boxes are sound and the layout still works.
How long cabinet painting typically lasts
The answer to how long does cabinet painting last depends on the kitchen and the quality of the work. A well-prepared, professionally painted finish can look good for roughly 7 to 10 years under normal household conditions, while heavily used kitchens may need attention earlier. These are practical ranges rather than guarantees, since no two homes place the same demands on their cabinets.
The average lifespan of professionally painted cabinets
Professionally painted cabinets often hold their appearance for several years before noticeable touch-ups become necessary. A finish at the longer end of the range usually benefits from sound cabinet surfaces, careful preparation, suitable coatings, and gentle cleaning. Homeowners looking for a useful benchmark can also review this cabinet paint lifespan guide, while treating any published range as an estimate rather than a promise.
The finish may still be functional after it begins to look tired. A few worn areas do not necessarily mean the entire kitchen needs to be redone, especially when the doors and cabinet boxes remain structurally sound.
Why kitchen cabinets experience more wear
Kitchen cabinets face a steady mix of friction and exposure. Hands open doors and drawers repeatedly, rings and fingernails catch edges, and cooking produces grease and moisture that settle on nearby surfaces. Cabinets beside sinks, dishwashers, ranges, and trash pullouts generally show wear first because they experience more contact and harsher conditions.
Ventilation and cleaning habits influence this process, too. Removing residue before it builds up is easier on a painted finish than scrubbing a thick layer of grease later.
How usage affects painted cabinet durability
A lightly used kitchen in a quiet household may age differently from a busy family kitchen that is opened dozens of times each day. The most frequently touched doors, drawer fronts, and handles will usually develop visible wear before cabinets in less active areas. Regular use is not a problem by itself; repeated impact, abrasion, and harsh cleaning are what tend to shorten the finish’s attractive life.
A simple inspection every few months can catch small problems while they are still easy to address. This is especially helpful around pulls, corners, and the cabinet beneath the sink.
When painted cabinets may need attention sooner
Paint may need attention sooner when preparation was rushed, surfaces were not fully clean, or the coating did not suit the cabinet material. Excess humidity, direct heat, water leaks, and doors that rub against one another can also cause premature damage. Early peeling or widespread chipping is a reason to ask what is happening beneath the finish, not simply to add another coat.
A professional assessment can separate a localized repair from a larger refinishing issue. That distinction helps avoid spending money on touch-ups that will not hold.
What determines how long cabinet painting lasts
Cabinet painting is not one isolated step. The existing surface, the condition of the wood or engineered material, the preparation process, and the surrounding environment all affect the result. Even a high-quality coating can fail when it is applied over grease, loose finish, or damaged edges.
For homeowners comparing approaches, this painted cabinet durability overview offers another useful way to think about why some projects age better than others.
Cabinet material and existing finish
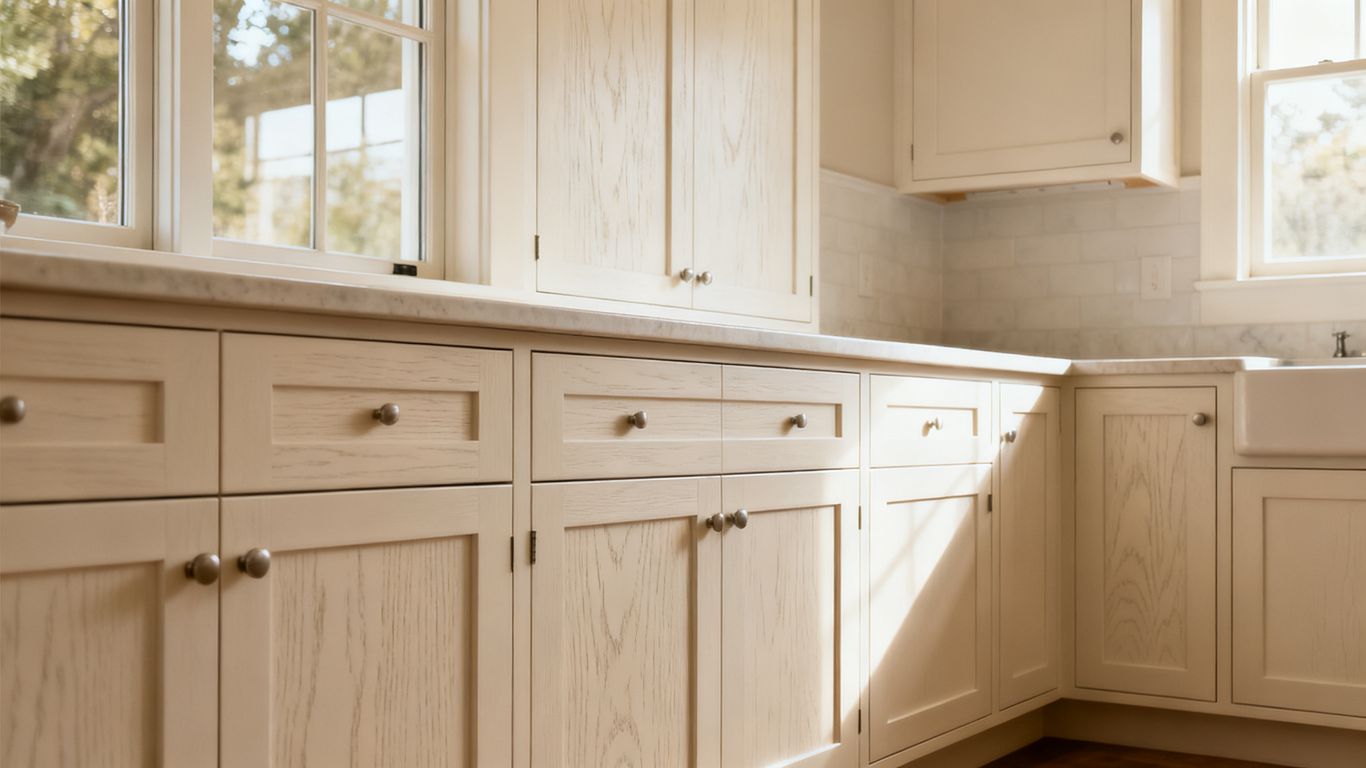
Wood, laminate, thermofoil, and previously painted surfaces do not all accept new coatings in the same way. Some materials need specialized preparation or bonding products, while an old finish may need to be scuffed or removed where it is loose. The cabinet’s construction and the condition of its edges should be evaluated before choosing a process.
A stable surface gives the new coating something dependable to hold onto. If the substrate is swollen, delaminating, or crumbling, paint can improve its appearance only temporarily.
Surface preparation and repairs
Preparation is where much of the long-term result is decided. Cabinets need to be cleaned of cooking oils and residue, lightly abraded where appropriate, and repaired before primer and finish coats are applied. Doors should also be labeled, removed carefully, and returned to their proper positions so the finished work remains consistent.
Skipping preparation can leave a smooth-looking surface that fails quickly under ordinary handling. Thorough surface preparation is often less visible than the color, but it has a direct effect on adhesion and durability.
Paint quality and application method
The coating should be selected for cabinet use and applied in a controlled, even manner. Brush and roller work can be appropriate in some situations, but they may leave more texture or make it harder to achieve a uniform finish. Spray application, when performed correctly, can produce an even surface on doors, drawer fronts, and other removable pieces.
Frontjes Painting has an industrial friendly spray shop for projects involving cabinets, pieces and parts, doors, and frames. The value of that setting is control over the application process, not a guarantee that every cabinet will last for the same number of years.
Humidity, heat, and daily exposure
Moisture near sinks and dishwashers, heat near cooking areas, and poor airflow can all place extra stress on painted surfaces. Water should not be allowed to sit on door edges or seams, and leaks inside a sink cabinet should be corrected promptly. In West Michigan, seasonal humidity changes may also make ventilation and quick cleanup worthwhile.
The following conditions commonly deserve extra attention because they combine exposure with frequent handling:
- Cabinet doors beside the dishwasher or range
- Sink bases exposed to drips or damp towels
- Trash and recycling pullouts touched throughout the day
- Lower doors near pets, children, or floor-cleaning water
These areas are not automatically destined to fail. They simply benefit from better ventilation, careful wiping, and earlier maintenance than quieter cabinet sections.
Professional cabinet painting vs. DIY results
DIY cabinet painting can be rewarding, especially for a homeowner with time, patience, and a suitable work area. The difference between an acceptable short-term refresh and a durable finish often comes down to process control. Professionals bring repeatable preparation and application habits, while DIY projects commonly take longer than expected because every door and drawer must be handled individually.
Advantages of professional spray application
Spraying can create a consistent film with less visible brush texture when the surface is properly prepared and the application is performed in a controlled space. Removable doors and drawer fronts can be placed for even coverage, then allowed to dry without kitchen traffic around them. It also helps a crew maintain a uniform appearance across multiple cabinet components.
Frontjes Painting’s spray shop is described as suitable for cabinets, pieces and parts, doors, and frames. Homeowners should still ask about the preparation, coating system, curing time, and care instructions for their particular project.
Why proper cleaning and sanding matter
Paint needs a clean, stable surface. Grease, polish, wax, and cleaning residue can interfere with adhesion, while glossy areas may prevent primer or paint from gripping evenly. Sanding or scuffing should be appropriate to the material; excessive sanding can damage veneer, while too little may leave a slick surface.
The work area matters as well. Dust settling into wet paint can affect the finish, and reassembling doors before the coating has cured can create sticking or marks.
Common DIY mistakes that shorten cabinet lifespan
Many early failures come from trying to save time on steps that do not show immediately. A thin-looking finish, rough edges, or doors that stick may be signs that the process moved too quickly. Before starting, it helps to plan for drying space, labeling, cleaning, and the time required for each coat.
Frequent mistakes include:
- Painting over grease or residue
- Skipping repairs on loose veneer or damaged edges
- Applying coats that are too heavy or uneven
- Reinstalling doors before the finish has cured
Avoiding these errors does not require specialized language or complicated equipment, but it does require patience. If the project becomes difficult to control in a garage or kitchen, professional help may protect both the finish and the household’s time.
When refinishing is better than replacing
Refinishing is often a sensible option when the cabinet boxes are solid, the doors operate well, and the existing layout still suits the household. It can update the color and overall appearance without removing every cabinet from the room. Replacement may be more appropriate when storage needs have changed, the layout is poor, or the boxes are badly damaged.
This cabinet painting versus replacement comparison can help frame the decision around cost, disruption, and the condition of what is already installed. The right answer is specific to the kitchen rather than determined by paint alone.
Signs your painted cabinets need maintenance or repainting
Painted cabinets usually give visible clues before they require major work. A few scratches around a pull are different from widespread peeling, and a loose hinge is different from a cabinet box damaged by water. Paying attention to the pattern and location of the wear helps identify the most practical response.
Chipping, peeling, and flaking paint
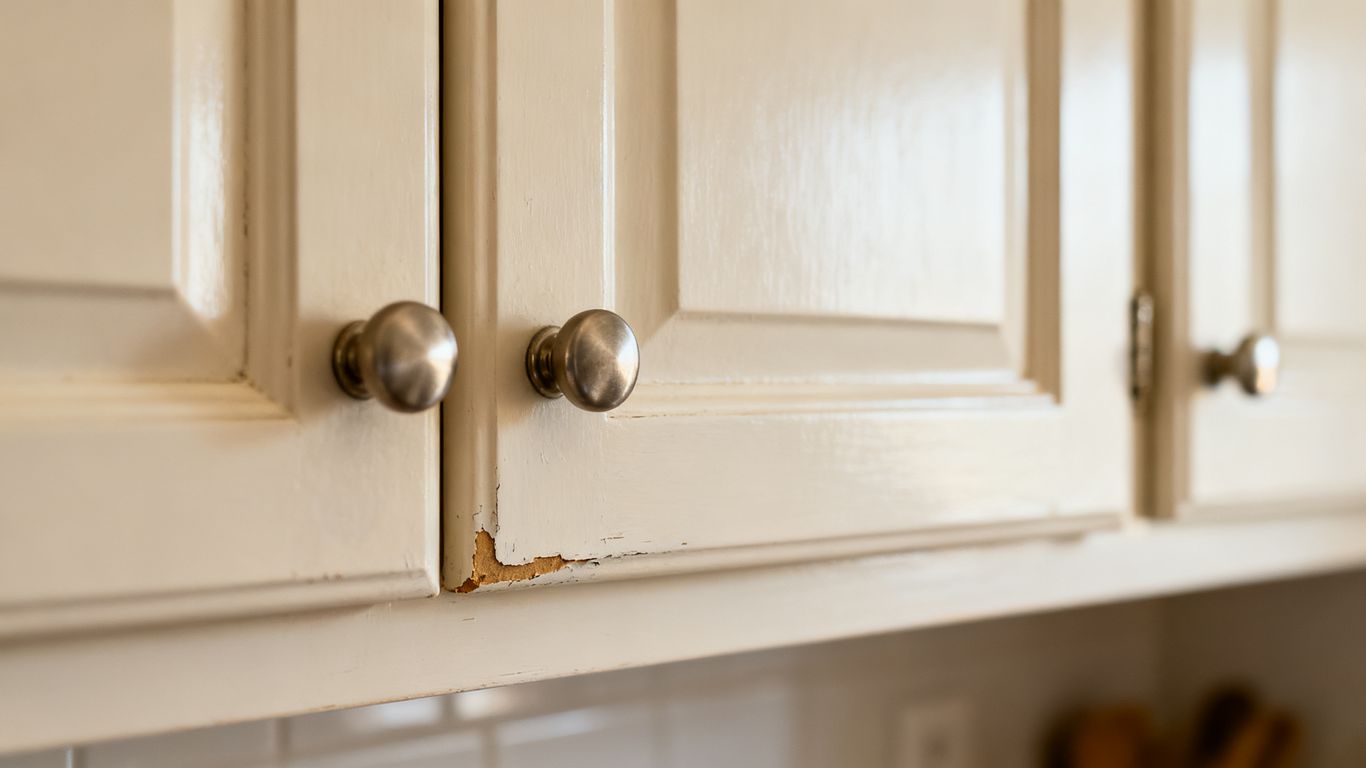
Small chips often appear on exposed corners, door edges, and areas where hardware makes contact. Peeling or flaking over a broad area may indicate poor adhesion, moisture beneath the coating, or movement in the underlying material. Do not simply paint over loose flakes; they should be removed and the surface should be evaluated first.
If damage is isolated, a careful repair may be enough. If it keeps returning in the same place, the underlying cause needs attention before repainting.
Scratches, stains, and visible wear
Light scratches and dull spots are common in active kitchens. Stains that clean away are generally a maintenance issue, while stains that remain or expose the substrate may call for touch-up painting. A finish that looks worn only around a few handles can often be refreshed without disturbing the entire kitchen.
Use the gentlest cleaning approach that removes the soil. Repeated use of abrasive pads can turn a small appearance problem into a larger loss of sheen.
Loose doors, worn edges, and damaged hardware
Not every cabinet problem is a paint problem. Loose hinges, misaligned doors, and missing bumpers can cause rubbing that wears away the finish. Handles that have loosened may also allow repeated movement against the painted surface.
Correcting the hardware first can stop additional damage. Once the door sits squarely and opens smoothly, the remaining chips or worn spots are easier to repair neatly.
How to distinguish cosmetic wear from moisture damage
Cosmetic wear is usually limited to contact points and does not change the shape or strength of the cabinet. Moisture damage may show as swelling, soft material, lifting veneer, dark discoloration, or paint that repeatedly bubbles. Look inside the sink cabinet and around dishwasher and countertop seams when exterior damage seems unexplained.
Persistent moisture should be corrected before any repainting begins. Otherwise, a fresh finish may hide the problem briefly while the cabinet continues to deteriorate underneath.
How to make painted cabinets last longer
The best cabinet-care routine is simple enough to follow and consistent enough to matter. Clean spills promptly, avoid aggressive products, and keep doors and hardware adjusted. A few minutes of preventative care can reduce the friction and moisture that gradually wear down the finish.
Cleaning products and techniques to use
Use a soft cloth with mild soap diluted in water, then wipe away residue and dry the surface. Avoid soaking seams, spraying cleaner directly into gaps, or using abrasive scrubbers unless a coating manufacturer specifically recommends them. Grease near cooking areas may require more than one gentle pass rather than one harsh treatment.
Test an unfamiliar cleaner in an inconspicuous place first. A finish that looks fine when dry can still lose sheen after repeated exposure to a strong product.
Protecting high-touch and high-moisture areas
Cabinets near sinks, dishwashers, ranges, and trash pullouts deserve extra care. Use ventilation while cooking, dry splashes quickly, and repair plumbing leaks as soon as they appear. Soft-close hardware and properly placed bumpers can also reduce slamming and repeated impact.
If towels regularly hang against a cabinet end panel, move them so moisture is not held against the painted surface. Small changes in routine are often easier than repairing a recurring problem.
Adjusting doors and tightening hardware
A door that rubs, drags, or sits unevenly can damage its edges every time it moves. Check hinges and screws periodically, but tighten them gently so the material is not stripped. Replace missing bumpers and adjust doors that no longer close cleanly.
Hardware maintenance is particularly useful after a repaint because it protects the new finish from unnecessary contact. It also keeps ordinary wear from being mistaken for a coating failure.
Touch-up painting and preventative maintenance
Keep a small amount of the matching touch-up material if the painter provides it, and record where it was used. Clean the area, remove loose material, and apply a modest amount rather than building a raised patch. Touch-ups are easiest when the damage is limited and the surrounding finish is still in good condition.
A seasonal check can cover door alignment, sink-cabinet plumbing, high-touch edges, and areas near heat. That routine gives you a chance to act before minor wear spreads.
When to repaint or replace your cabinets
Repainting and replacement solve different problems. Paint changes the visible finish, while replacement changes the cabinet components, layout, and sometimes the storage capacity. The condition of the boxes and the way the kitchen functions should guide the decision more than the age of the color alone.
Situations where repainting makes sense
Repainting makes sense when the cabinet boxes are stable, the doors are serviceable, and the kitchen layout still works. It is also useful when the main issue is an outdated color, surface wear, or a desire for a cleaner, more current appearance. A professional can identify repairs and explain whether the existing material is a good candidate.
This approach can limit demolition and preserve features that already fit the room. It may also allow the household to focus its budget on hardware, lighting, or other improvements.
When cabinet boxes are too damaged to refinish
Replacement deserves consideration when boxes are swollen, structurally weak, badly warped, or repeatedly affected by unresolved leaks. Delaminated surfaces and extensive water damage can prevent a new finish from lasting. A poor layout or inadequate storage may also make painting an expensive way to preserve a kitchen that does not function well.
A visual inspection should include the cabinet interiors, sink base, toe kicks, and attachment points. Surface appearance alone cannot reveal every structural problem.
Comparing the cost and disruption of each option
Painting is generally less disruptive than removing and installing a full set of cabinets, but the exact cost depends on cabinet count, repairs, door design, and the selected finish. Replacement may involve demolition, ordering, installation, countertops, plumbing adjustments, and longer periods of limited kitchen access. A realistic comparison should include those related costs rather than looking only at the cabinet fronts.
The same careful planning used for a local service area strategy is useful here in a practical sense: define the project, understand the home’s constraints, and choose a provider who communicates clearly about the work. For a broader look at project timing, see this cabinet painting timeline guide.
How a professional cabinet painting service can help in West Michigan
A local professional can inspect the existing finish, discuss preparation and repairs, explain the application method, and set expectations for access to the kitchen. Frontjes Painting has served West Michigan since 1999 and handles cabinet refinishing along with residential and commercial painting projects. Its documented industrial friendly spray shop is available for cabinets, pieces and parts, doors, and frames, while the broader approach emphasizes clear communication, careful work, and a clean job site.
Those details are more useful than a promise of a fixed lifespan. Ask what will be cleaned, repaired, sprayed, cured, and reinstalled, then follow the care guidance provided for the finished surfaces.
For homeowners who enjoy checking details before committing to a project, the habit is similar to reviewing Jordan 4 Off-White details, comparing mortgage repayment factors, or organizing information through a topical content map: the surrounding context matters. Those subjects are unrelated to cabinet painting, but the broader lesson is familiar—look beyond the headline and examine the details that affect the outcome.
Conclusion
Painted cabinets can provide a durable, attractive update when the surfaces are sound, preparation is thorough, and everyday care is sensible. Watch the high-use areas, correct moisture and hardware problems early, and choose repainting or replacement based on the cabinet’s condition and the kitchen’s function.
Frequently Asked Questions
How long does cabinet painting usually last?
Professionally painted cabinets commonly remain attractive for about 7 to 10 years with normal use and care, although high-use kitchens or poorly prepared surfaces may need attention sooner.
What makes cabinet paint wear out faster?
Grease, steam, spills, frequent handling, slamming doors, abrasive cleaners, and moisture leaks can all shorten the finish’s useful life.
Is professionally painted cabinet finish more durable than DIY paint?
It can be, especially when professional work includes thorough cleaning, appropriate sanding, repairs, controlled application, and adequate curing time. The result still depends on the materials and process used.
Can chipped cabinet paint be repaired without repainting everything?
Small, isolated chips may be repaired with careful touch-up work. Widespread peeling, repeated bubbling, or mismatched repairs may require broader refinishing.
How should painted cabinets be cleaned?
Use a soft cloth and mild diluted soap, avoid soaking seams, dry surfaces promptly, and stay away from abrasive pads or harsh cleaners unless specifically approved for the finish.
Should cabinets be repainted or replaced?
Repainting is often suitable when the boxes are sound and the layout works. Replacement may be better when there is structural or moisture damage, poor functionality, or a need for substantially different storage.
When should a professional inspect painted cabinets?
Consider an inspection when paint repeatedly peels, cabinet material is swollen or soft, doors rub after adjustment, or you cannot identify the source of recurring moisture or finish damage.